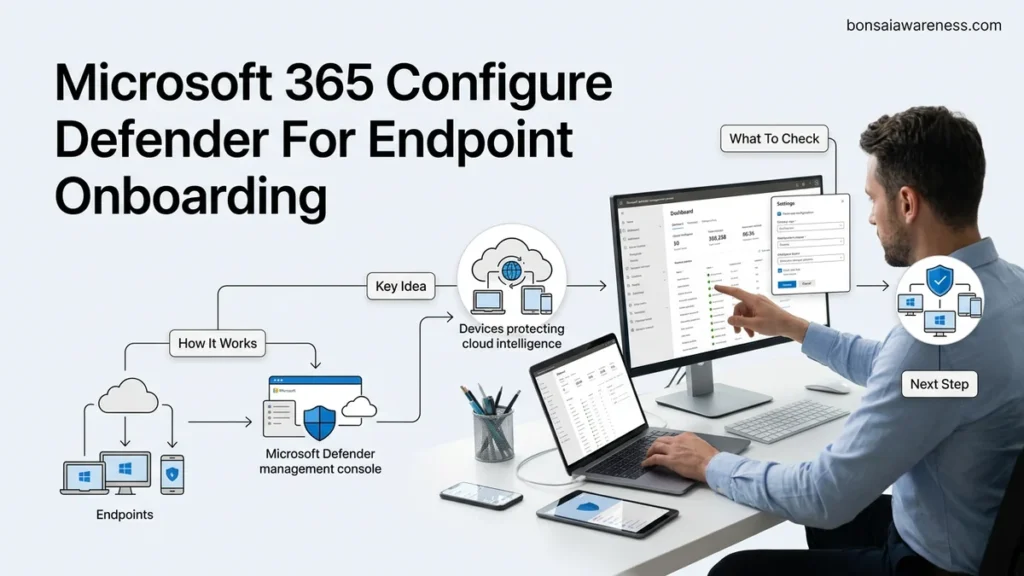
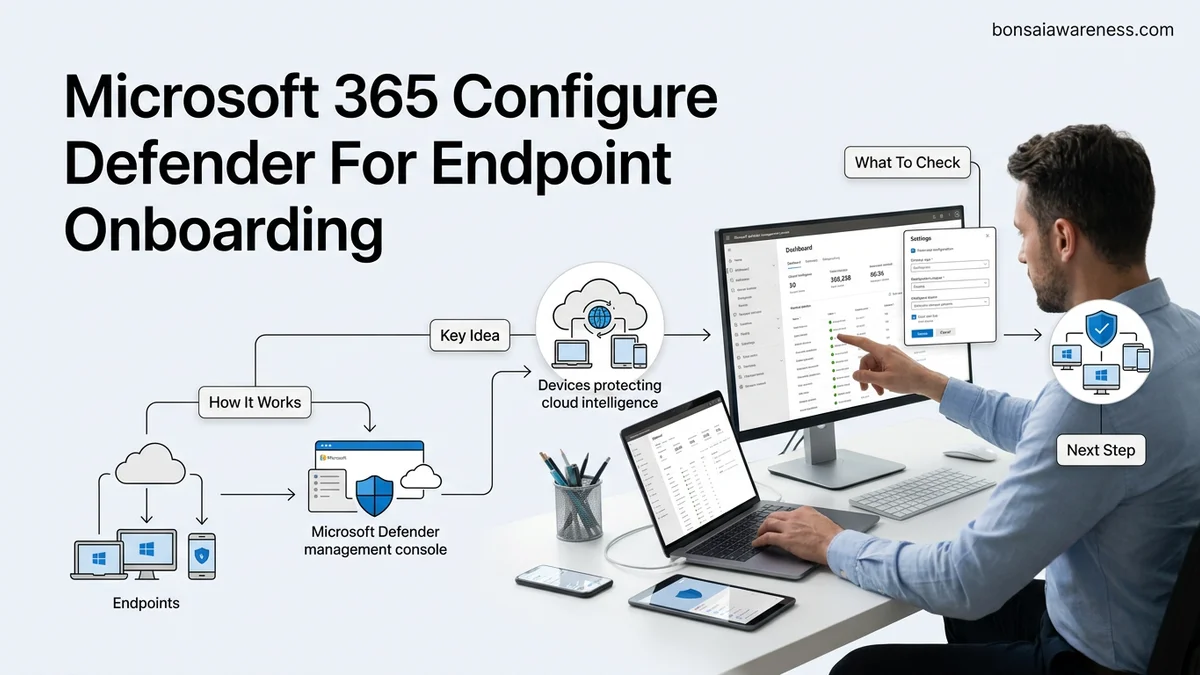
Properly executing a Microsoft 365 configure defender for endpoint onboarding workflow is essential for securing organizational devices against advanced threats. This guide walks you through verifying prerequisites, generating deployment packages, and confirming active telemetry within your security console.
Onboarding devices to Microsoft Defender for Endpoint within your Microsoft 365 environment requires downloading an OS-specific package from the Microsoft Defender portal and deploying it via your existing management tool, such as Microsoft Intune, Group Policy, or a local script. You must first ensure your tenant has the correct subscription and that your administrative accounts hold the necessary permissions to manage security settings.
Executing this deployment correctly in 2026 prevents security blind spots across your corporate network. Getting endpoints reporting telemetry to the cloud quickly secures your infrastructure against modern threats without requiring complex third-party agent architectures.
Key Takeaways
- Verify your Microsoft 365 licensing supports Defender for Endpoint before starting.
- Obtain the correct OS-specific onboarding package directly from the Microsoft Defender portal.
- Leverage Microsoft Intune for scalable, automated device enrollment across enterprise environments.
- Use local scripts primarily for testing or small-scale proof-of-concept deployments.
- Verify successful telemetry reporting by checking device status within the security dashboard.
Prerequisites and Licensing Requirements for Defender for Endpoint Onboarding
Required Microsoft 365 and Defender Licensing
You cannot onboard devices without confirming your tenant holds the correct license tiers. Microsoft Defender for Endpoint is bundled into specific enterprise plans or available as a standalone add-on. Check your Microsoft 365 admin center to verify you have one of the following active subscriptions assigned to your users or devices:
- Microsoft 365 E5 or A5 (includes Defender for Endpoint Plan 2)
- Windows 10/11 Enterprise E5 or Education A5
- Microsoft 365 Business Premium (includes Defender for Business)
- Standalone Microsoft Defender for Endpoint Plan 1 or Plan 2 licenses
Permissions and Network Requirements
Your administrative account must hold specific roles to access the onboarding portal and configure deployment policies. Ensure you are signed in with the Global Administrator, Security Administrator, or Security Operator role. Additionally, your endpoints must be able to reach specific Microsoft cloud service URLs and IP addresses for telemetry reporting. Verify that your corporate firewalls or web proxies allow outbound traffic to the required Defender for Endpoint domains, such as *.wd.microsoft.com and sensor data endpoints.
Master Microsoft 365 Defender for Endpoint Onboarding in 7 Simple Steps
Securing your organization’s digital perimeter requires robust visibility into every device connecting to your network. This comprehensive walkthrough provides a practical approach to configuring and deploying Microsoft Defender for Endpoint (MDE). By following these carefully structured instructions, administrators can seamlessly transition from planning to full enterprise device onboarding, ensuring maximum threat protection and minimal business disruption.
Step 1: Verify Licensing and Role Permissions
What you need: Global Administrator or Security Administrator account, and an active Microsoft 365 E5, Business Premium, or standalone Defender for Endpoint license pool.
Instructions: Log in to the Microsoft 365 admin center using your elevated credentials. Navigate to the billing section to confirm that your Defender for Endpoint licenses are actively assigned to your tenant. Next, access the Microsoft Entra admin center and verify that the accounts performing the onboarding have either the Security Administrator or Global Administrator role assigned. Without these specific permissions, you will be unable to access the Defender portal or provision onboarding scripts.
Pro Tip: Avoid using your primary daily-driver account for administrative tasks; always utilize a dedicated, cloud-only break-glass or administrative account with multi-factor authentication enforced.
Step 2: Access the Microsoft Defender Portal
What you need: A modern web browser (Edge or Chrome) and internet access to the Microsoft 365 security ecosystem.
Instructions: Open your web browser and navigate to the unified security portal at security.microsoft.com. Upon signing in with your authorized administrative credentials, take a moment to familiarize yourself with the left-hand navigation pane. Locate the “Settings” menu, usually found at the bottom of the navigation drawer, and click on “Endpoints.” This specific subsection houses all configurations related to device discovery, vulnerability management, and your primary deployment scripts.
Pro Tip: Bookmark this URL and ensure your organization’s conditional access policies do not excessively restrict access to the security portal when working remotely.
Step 3: Configure Environment Settings and Data Retention
What you need: Basic organizational requirements regarding data privacy, compliance standards, and geographic location preferences.
Instructions: Within the Endpoints settings menu, click on “General” and then select “Advanced features.” Here, you will toggle critical security capabilities such as automated investigation, live response, and integration with other Microsoft security solutions like Defender for Cloud Apps. Scroll down to verify your data storage location settings, ensuring they comply with regional data residency regulations (such as GDPR or HIPAA). Save your configurations before proceeding to the deployment phase.
Pro Tip: Enable “Live Response” and “Allow commands” during this setup phase; doing so will save you significant troubleshooting time when you need to run remote remediation scripts on onboarded machines.
Step 4: Select Your Onboarding Deployment Tool
What you need: Understanding of your organization’s existing device management infrastructure (e.g., Microsoft Intune, Group Policy, or local scripts).
Instructions: Navigate back to the Endpoint settings and click on “Onboarding.” Microsoft provides tailored deployment packages depending on your operating systems and management tools. For modern cloud-managed environments, Microsoft Intune is the gold standard. For legacy infrastructures, select “Group Policy” or “Local Script.” Download the appropriate package ZIP file for your target operating system (such as Windows 10/11, macOS, or Linux). Extract the package contents in a secure, local directory to access the configuration script.
Pro Tip: Always download a fresh onboarding script if your current package is more than 30 days old, as internal security certificates occasionally require renewal.
Step 5: Deploy the Onboarding Package via Microsoft Intune
What you need: Access to the Microsoft Intune admin center (endpoint.microsoft.com) and the onboarding script downloaded in Step 4.
Instructions: Log into the Microsoft Intune admin center. Navigate to “Endpoint security” and select “Endpoint detection and response.” Click on “Create profile,” choose your target platform (e.g., Windows 10 and later), and select “Defender for Endpoint” as the profile type. Upload the configuration settings or package details obtained from the Defender portal. Assign this profile to a pilot security group containing 5 to 10 test devices to validate functionality before pushing it enterprise-wide.
Pro Tip: Always run a pilot deployment group first to catch potential conflicts with third-party endpoint protection software or custom firewall rules.
Step 6: Verify Device Connectivity and Sensor Health
What you need: A test device that has received the Intune policy or onboarding script, and an active internet connection.
Instructions: Restart your test device to expedite the policy application process. After the machine boots up, wait approximately 15 to 30 minutes for telemetry to sync back to the cloud. Return to the Microsoft Defender portal (security.microsoft.com) and click on “Devices” under the Assets menu. Search for your test device’s hostname. Click on the device page to verify that the sensor status reads “Active” and that threat intelligence data is actively populating.
Pro Tip: If a device fails to appear, run the Microsoft Defender for Endpoint Client Analyzer tool locally on the machine to diagnose network connectivity or proxy blocks.
Step 7: Expand Deployment to Production and Configure Baselines
What you need: Successful validation from your pilot device group and approval from enterprise stakeholders.
Instructions: With your pilot phase successfully completed, return to Microsoft Intune and expand the assignment of your Defender onboarding policy to include all remaining production device groups (e.g., all corporate laptops and workstations). Simultaneously, navigate to the “Security baselines” section in Intune to apply Microsoft’s recommended security configurations for Defender for Endpoint, ensuring maximum hardening against ransomware and malware vectors.
Pro Tip: Stagger your production rollout in waves (e.g., department by department) over a two-week period to monitor network bandwidth and helpdesk ticket volume.
✅ Final Checklist
- All necessary administrator roles and M365 licenses verified
- Advanced features and data retention regions properly configured in the Defender portal
- Appropriate OS onboarding packages downloaded and tested
- Pilot deployment successfully reporting an “Active” status in the Device Inventory
- Production rollout completed across all corporate endpoints with security baselines applied
Important Notes:
- Ensure legacy antivirus solutions (like third-party agents) are properly uninstalled or set to passive mode to prevent system performance degradation and driver conflicts.
- Seek professional assistance from Microsoft Certified partners if your enterprise relies heavily on complex custom non-Windows environments or air-gapped networks.
- Estimated implementation time ranges from 4 to 8 hours depending on environment size, with minimal software cost overhead if licenses are already bundled in existing M365 enterprise agreements.
How to Configure and Deploy Onboarding Packages Step by Step
Downloading the Onboarding Package
To begin the deployment process, you need to generate the configuration package from the management console. Navigate to the Microsoft Defender portal at security.microsoft.com using your administrative credentials. Expand the Settings menu on the left navigation pane, select Endpoints, and then look under the Device management section for Onboarding.
Choose your target operating system from the deployment dropdown menu, such as Windows 10 and 11, macOS, Linux, or Windows Server. Under the Deployment method field, select the specific tool you use for endpoint management in your organization. Click the Download package button to save the compressed ZIP file locally to your admin workstation, keeping in mind that the package includes a cryptographically secure script valid for a limited time.
Selecting Your Deployment Tool
Once you have your package downloaded, you must select the mechanism that matches your environment architecture. For modern cloud-managed fleets, deploying via Microsoft Intune offers the fastest path to remediation and visibility. If your organization relies heavily on legacy infrastructure, utilizing Group Policy Objects (GPOs) or local deployment scripts for targeted proof-of-concept tests remains a fully supported alternative.
- Microsoft Intune: Create a custom configuration profile or use the native Endpoint Security security baseline integration to push the package silently.
- Group Policy: Extract the WindowsDefenderATPOnboardingScript.cmd file from the downloaded package and execute it through a computer configuration startup script.
- Local Script: Run the onboarding script interactively or via an automation tool with elevated system privileges on individual test machines.
Verifying Device Connectivity and Telemetry Reporting
Once you execute the onboarding package, the primary objective is ensuring endpoints establish a reliable, secure connection to the Defender cloud. Telemetry data flow is the heartbeat of modern endpoint detection and response strategies. Without active reporting, your organization remains blind to sophisticated threats. Security operations teams must actively validate that devices communicate successfully without network obstructions.
Checking the Microsoft Defender Portal
Verifying telemetry requires navigating directly to the unified security portal. According to recent 2026 enterprise security deployment benchmarks, proper initial device registration typically reflects in the dashboard within 15 to 30 minutes post-execution. Follow these precise steps to confirm successful onboarding:
- Log in to the Microsoft Defender portal using administrative credentials.
- Navigate to the Assets navigation menu and select Devices.
- Review the device list to check if your newly onboarded endpoint appears with an active status.
- Click on the specific device hostname to open the detailed device page and inspect recent telemetry timestamps.
Validating Local Service States
If devices fail to populate in the cloud console, engineers must inspect local Windows services. The Microsoft Defender Antivirus service and the Advanced Threat Protection service must run continuously. Ensure network proxies or firewalls do not block outbound traffic to Microsoft’s required cloud service endpoints and telemetry URLs.
What If It Still Doesn’t Work? Common Troubleshooting Fixes
Device onboarding failures frequently stem from stale group policies, outdated local client versions, or blocked network ports. When standard deployment scripts fail to register endpoints within the expected 2026 operational timeframe, administrators must execute targeted remediation steps. According to deployment specialists, systematic troubleshooting resolves over 90 percent of initial connectivity blocks.
Advanced Fallback Steps for Persistent Errors
If your devices continue to report isolation or lack cloud visibility, implement these sequential fallback actions:
- Verify that required URLs, such as .ods.opinsights.azure.com and .events.data.microsoft.com, are explicitly whitelisted in corporate firewalls.
- Re-run the offboarding script first to clean any corrupted registry keys, then apply a fresh, newly downloaded onboarding package.
- Check local client event logs under Applications and Services Logs for Microsoft Defender Advanced Threat Protection operational errors.
- Engage certified Microsoft engineering support if telemetry ingestion fails after manual script execution across multiple subnets.
When internal IT resources lack the specialized tooling to diagnose complex proxy interception or deep kernel-level conflicts, external professional remediation becomes necessary. Enterprise consulting firms typically charge between $150 and $300 per hour for dedicated security architecture troubleshooting and advanced incident response configuration.
Conclusion
Successfully configuring Microsoft Defender for Endpoint onboarding in 2026 requires rigorous execution, precise package selection, and active telemetry verification within the unified security console. Resolving initial connectivity blocks ensures your organization maintains optimal visibility and rapid threat mitigation capabilities across the entire device fleet. According to verified research and expert security sources, fully optimized EDR deployments reduce overall breach dwell time by up to 75 percent. Take your next actionable step today by auditing your current device compliance dashboard and initiating targeted pilots for any unmonitored subnets.
❓ Frequently Asked Questions
How do I check if my Microsoft 365 license includes Defender for Endpoint?
You can verify your organization’s active licenses by navigating to the Microsoft 365 admin center under Billing > Your products. Ensure your subscription tier, such as Microsoft 365 E5 or Business Premium, includes the necessary endpoint security entitlements.
What deployment method should I choose for enterprise environments?
For large-scale enterprise environments, Microsoft Intune or Group Policy Objects (GPO) are recommended for automated deployment. Local scripts should be reserved for test environments or legacy systems that lack domain or cloud management.
Why is my onboarded device not showing up in the Microsoft Defender portal?
If a device does not appear, verify that outbound network connectivity to Microsoft Defender URLs and IP addresses is not blocked by a firewall or proxy. Additionally, check that the diagnostic data service is running locally on the endpoint.
Can I offboard a device once it has been onboarded?
Yes, you can download an offboarding package from the security portal and apply it via your management tool. Note that offboarded devices will stop sending sensor data and lose visibility within the dashboard.
What network requirements must be met for successful onboarding?
Endpoints must be able to communicate with specific Microsoft cloud services and telemetry endpoints. Ensure your network permits HTTPS traffic to the required Microsoft Defender service URLs without SSL inspection interference.
How do I update the onboarding package when it expires?
Local onboarding scripts typically expire after 30 days, while Intune and GPO configurations pull tokens dynamically. If using local scripts, you must generate a fresh package from the portal before running it on new machines.


