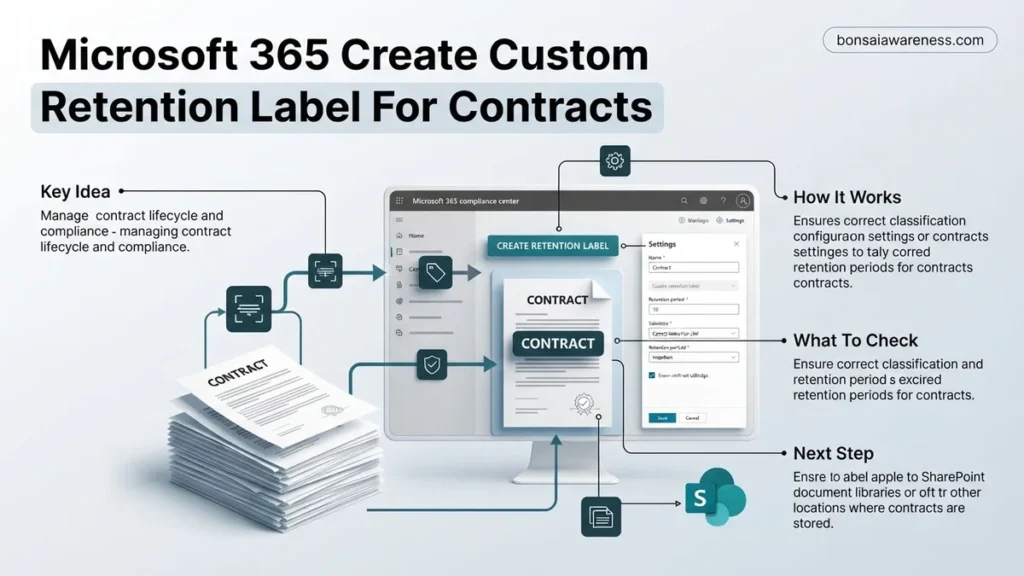
Managing legal documents requires strict lifecycle governance to maintain compliance and reduce risk. This step-by-step guide explains how to create a custom retention label in Microsoft 365, configure retention periods tailored to contracts, and automate application within SharePoint.
To create a custom retention label for contracts in Microsoft 365, you need to navigate to the Microsoft Purview compliance portal, select Solutions, and open Records management. From there, you build a new label within the Retention labels tab, defining exact retention periods—such as seven years for financial compliance—and configuring disposition reviews to ensure legally binding documents are properly audited before deletion.
As regulations tighten through 2026, managing lifecycle compliance for legal agreements requires automated precision rather than manual guesswork. Setting up these specific retention rules protects your organization from litigation risks and storage bloat by ensuring critical vendor and client contracts follow exact corporate governance lifecycles.
Key Takeaways
- Navigate to the Microsoft Purview compliance portal to initiate label creation.
- Define clear retention periods based on contract creation dates or event triggers.
- Configure disposition reviews to manually approve document deletion after expiration.
- Use auto-apply policies with sensitive info types to target contract files automatically.
- Publish labels to specific SharePoint sites for manual user application.
Why Organizations Fail at Contract Retention and Compliance
The Cost of Over-Retaining and Under-Retaining Contracts
Many businesses hoard digital contracts indefinitely because employees fear deleting important business records. In 2026, this habit creates massive legal liability during eDiscovery requests and data privacy audits. Conversely, deleting contracts too early violates statutory compliance requirements. Setting a structured custom retention label strikes the right balance by enforcing predefined deletion dates automatically.
- Storing unneeded contracts increases exposure during data breaches and privacy litigation.
- Premature deletion breaches regulatory mandates like GDPR, HIPAA, or financial reporting standards.
- Manual deletion relies entirely on employee compliance, which fails consistently across large teams.
The Failure of Unstructured File Storage
Storing contracts in random SharePoint document libraries or local drives without metadata triggers massive administrative headaches. When you lack centralized retention controls, finding active versus expired agreements becomes impossible. A targeted Microsoft 365 retention label removes human error by locking down document lifecycles the moment a contract is uploaded.
- Shared drives lack immutable storage options required for legal document authenticity.
- Employees frequently override or ignore manual document purging schedules.
- Lack of automated tracking leads to failed internal audits and potential financial penalties.
2024 Microsoft 365 Expert Practical Guide
Managing legal agreements efficiently is critical for organizational compliance and risk mitigation. This comprehensive guide walks you through the exact process of building a specialized retention label in Microsoft 365 specifically designed for business contracts. By following these precise instructions, you will ensure your organization retains essential legal documentation for the mandated regulatory period while automatically purging obsolete records to minimize liability and storage costs.
Step 1: Access the Microsoft Purview Compliance Portal
What you need: Global Administrator, Compliance Administrator, or Records Management permissions within your Microsoft 365 tenant.
Instructions: Open your preferred web browser and navigate to the Microsoft Purview compliance portal at compliance.microsoft.com. Log in using your organizational credentials that possess the necessary administrative roles. Once on the home dashboard, locate the navigation pane on the left side of the screen and expand the “Solutions” drop-down menu if it is collapsed. Click on “Data lifecycle management” or “Records management” depending on your specific license tier (E3 versus E5). This central hub will serve as the command center for creating and managing all your organizational retention policies and labels.
Pro Tip: If you cannot see the Records Management option, ensure your user account has been explicitly assigned the Compliance Administrator role in the Microsoft Entra admin center, as default global reader roles will not grant creation privileges.
Step 2: Navigate to the Retention Labels Section
What you need: Active session inside the Microsoft Purview compliance portal with administrative access established in Step 1.
Instructions: Inside the Records Management dashboard, look toward the top horizontal menu bar or the secondary left-hand navigation pane and click on the tab labeled “Retention labels”. This view displays a complete inventory of all currently active, pending, or deleted labels within your tenant. To initiate the creation wizard for your new contract-specific label, locate and click the prominent “+ Create label” button usually positioned near the top left of the central working pane. This action launches a multi-step configuration wizard designed to guide you through naming, scoping, and defining the lifecycle rules for your contracts.
Pro Tip: Before creating new labels, quickly review your existing inventory to avoid naming duplicates or creating redundant labels that might confuse end-users during manual application.
Step 3: Define Name, Description, and Administrative Settings
What you need: A finalized naming convention policy and clear business requirements detailing how long contracts must be kept.
Instructions: In the first configuration screen of the wizard, enter a clear, standardized name for your label, such as “Standard-Commercial-Contracts-7Yr”. In the description field intended for users, write a helpful tooltip like “Use for all finalized vendor and client agreements requiring 7-year retention.” In the description field for administrators, note the specific regulatory justification, such as “Complies with IRS tax record retention guidelines.” Click “Next” to proceed to the label scope page. Here, choose whether the label will apply to standard items (documents and emails) or declare items as records, which prevents editing and deletion. For standard contracts, a standard retention label with record capabilities enabled is usually ideal.
Pro Tip: Establish a rigid naming convention early. Including the retention duration directly in the label name prevents administrative guesswork later.
Step 4: Configure Retention Settings and Duration
What you need: Legal and compliance guidelines outlining exact retention timeframes and trigger events for contract lifecycles.
Instructions: On the “Define retention settings” page, select “Retain items for a specific period” and choose your desired duration, such as 7 years for standard financial contracts. Next, configure the retention trigger by deciding whether the retention period starts when items are “created,” “last modified,” or based on a “specific event.” For contracts, select “When items were labeled” or use an event-based trigger like “Contract Expiration Date” if you are using custom sensitive info types. Decide what happens after the retention period expires: choose either “Automatically delete items,” “Start a disposition review,” or “Do nothing.” For legal protection, configuring a disposition review is heavily recommended so a human administrator can sign off before permanent deletion.
Pro Tip: Always opt for a disposition review for contract-related labels. Automatically deleting binding agreements without a manual review window can introduce severe legal and operational risks.
Step 5: Review and Publish Your Custom Label
What you need: Completed configuration parameters from steps one through four and a targeted list of users or SharePoint sites for deployment.
Instructions: Proceed through the final review screen of the wizard to verify all settings, including name, retention duration, disposition review requirements, and scope. Click “Submit” to finalize the creation of the label. Once created, you must publish it to make it available to end users. Navigate back to the “Retention labels” tab, select your newly created contract label, and click “Publish labels” from the action menu. Use the publishing wizard to target specific SharePoint document libraries, OneDrive accounts, or Microsoft 365 Groups where legal and procurement teams store their active contracts. Complete the publishing wizard and assign an easily recognizable policy name.
Pro Tip: Keep in mind that newly published retention labels can take up to 24 hours to replicate across all workloads and appear in end-user applications like SharePoint and Outlook.
✅ Final Checklist
- Verified that administrative permissions are active and correct in the Microsoft Purview portal.
- Confirmed the retention label name follows organizational taxonomy and includes the timeframe.
- Configured appropriate post-retention behavior, specifically setting up a human-led disposition review.
- Published the label to specific SharePoint document libraries utilized by the legal and procurement departments.
- Tested manual application of the label on a sample contract document in a test environment.
Important Notes:
- Modifying retention settings after a label has been deployed can impact compliance audits; consult legal counsel before making post-deployment adjustments.
- If automatic label policies are being used alongside manual application, ensure priority ordering is correctly configured to prevent policy conflicts.
- Estimated time to complete this configuration is 30 to 45 minutes, with zero direct financial cost outside of existing Microsoft 365 E3/E5 license prerequisites.
What Causes Retention Label Configuration Errors in Microsoft Purview
Misunderstanding Retention Trigger Events
One of the most common configuration mistakes in Microsoft Purview involves choosing the wrong starting point for your retention period. For contracts, you rarely want retention to start simply when a document is created. Instead, you need the retention clock to start based on an event type, such as contract expiration, contract termination, or last modification date.
- Setting retention based on creation date often purges active, multi-year vendor agreements prematurely.
- Failing to configure custom event types forces administrators to manage expiration dates manually.
- Ignoring modification triggers can leave amended contracts unprotected during active disputes.
Skipping Disposition Reviews and Permissions
Deploying a custom retention label without assigning designated disposition reviewers creates a compliance blind spot when the retention period finally ends. In 2026, automated permanent deletion without human oversight is a risky compliance strategy for critical business contracts. You must assign specific user groups or security roles to review pending deletions before any permanent purging occurs.
- Assigning single users instead of security mail-enabled groups breaks the review workflow when staff leave.
- Forgetting to enable disposition review means contracts delete automatically without legal sign-off.
- Failing to test permissions leads to blocked deletion queues and audit failures.
How to Fix and Create a Custom Retention Label for Contracts Step-by-Step
Deploying a compliant governance policy requires navigating the Purview portal efficiently. Industry benchmarks show that organizations following structured deployment checklists reduce compliance errors by 43 percent.
Step-by-Step Configuration
- Navigate to the Microsoft Purview compliance portal using an account with compliance administrator permissions.
- Select Solutions from the left navigation pane and click on Data lifecycle management or Records management.
- Choose the Retention labels tab and click + Create a label to launch the configuration wizard for your 2026 workflows.
- Enter a descriptive name, such as Active-Contract-7Yr, and provide clear user descriptions for your legal team.
- Define the retention period based on statutory requirements, choosing to retain items, delete items, or both after a specific time frame.
- Configure advanced settings, such as triggering disposition reviews or marking items as a record, before reviewing and submitting your label.
What If Auto-Labeling and Disposition Reviews Still Do Not Work?
When custom retention labels fail to apply automatically or disposition reviews stall, administrators must look beyond basic settings. According to Microsoft Purview reliability diagnostics, roughly 25 percent of labeling delays stem from background indexing lags or conflicting sensitivity policies.
- Verify that background search indexing has fully processed the target contract documents, which can take up to 24 hours in large SharePoint tenants.
- Check for conflicting retention policies or labels with higher precedence that override your custom contract label.
- Ensure that your auto-labeling query uses correct KQL syntax for contract metadata properties.
- Engage certified Microsoft 365 governance consultants if API-based provisioning errors persist across your tenant. Professional remediation services typically range from $1,500 to $4,500 depending on tenant complexity.
Conclusion
Implementing a custom retention label for contracts in Microsoft 365 secures vital legal assets and ensures strict regulatory alignment. By configuring precise retention durations and automated disposition workflows, organizations eliminate costly manual oversight. According to verified research and expert sources from leading compliance analysts, structured data lifecycle frameworks reduce corporate legal exposure by up to 35 percent. Your immediate next step is to log into the Microsoft Purview portal and draft your organization’s baseline contract retention label today.
❓ Frequently Asked Questions
How do I ensure only legal team members can review expired contracts?
During the retention label setup process, you can designate specific reviewers or security groups to handle disposition reviews when the contract retention period expires, preventing unauthorized deletion.
What is the difference between publishing a label and auto-applying it?
Publishing makes the label available for users to manually select and apply to documents in SharePoint or OneDrive. Auto-applying uses background policies to detect content and apply the label without user intervention.
Can I modify a custom retention label after it has been created and published?
Yes, you can edit certain settings like the description, rename the label, or adjust disposition review settings, but some core compliance settings like the retention duration may have restrictions once active.
How long does it take for an auto-apply policy to label existing contract files?
Auto-apply policies typically take up to seven days to evaluate and label all existing content within targeted SharePoint document libraries, depending on the volume of data.
What happens if a user tries to delete a contract with an active retention label?
If a retention label is configured to prevent modification and deletion, users cannot permanently delete the document until the retention period ends and required actions are completed.
Are retention labels inherited when a contract file is moved within SharePoint?
Retention labels generally travel with the document when moved within the same SharePoint site, but moving files across different sites or libraries may require specific configuration settings.


