To reach all employees efficiently, administrators must use a dynamic distribution list in the Exchange Admin Center instead of adding users manually. This guide details the step-by-step setup, group type comparisons, and delivery management rules required for 2026.
To create a company-wide distribution list in Microsoft 365 that automatically reaches every employee, you need to use the Exchange Admin Center to set up a Dynamic Distribution Group. Unlike static lists that require manual updates every time a new hire joins or an employee leaves, a dynamic list pulls user data directly from your Azure Active Directory (Entra ID) based on specific attributes.
Setting this up correctly saves your IT team countless hours of maintenance and ensures that critical company-wide announcements never miss an inbox. In 2026, keeping your organization’s internal communication channels automated and secure is essential for operational efficiency, especially as remote and hybrid workforces continue to scale.
Key Takeaways
- Use dynamic distribution groups to automatically include all new hires without manual updates.
- Global Administrator or Exchange Administrator permissions are required to create the list.
- Configure delivery management settings to restrict who can email the entire company.
- Dynamic lists filter users based on user account attributes like department or company name.
- Standard distribution lists require manual user maintenance and are prone to outdated memberships.
Why Standard Lists Fail for Company-Wide Emails and What Causes Maintenance Issues
The Maintenance Nightmare of Static Lists
If you try to build a company-wide distribution list the traditional way, you end up adding every single employee manually. In a small team of ten, this is easy. In a growing company with 250, 500, or 5,000 employees, it becomes an administrative trap. Every single onboarding and offboarding cycle requires someone in HR or IT to remember to update the membership.
When someone forgets to update a static list, two bad things happen:
- New employees miss crucial company updates, policy changes, and leadership announcements during their first weeks.
- Departed employees or external contractors accidentally retain access to internal-only announcements, creating a security and compliance risk.
Delivery Failures and Permission Bottlenecks
Standard static distribution lists also suffer from delivery and permission scaling issues. If you restrict who can send to the list to prevent spam, you have to manage approval workflows. If you leave it open to everyone, any disgruntled employee or compromised account can blast the entire organization instantly.
Furthermore, standard lists do not scale intelligently with department changes. If your organization restructures or creates new regional offices, static groups require complete rebuilding. You need a system that updates itself in the background without human intervention.
Master Microsoft 365 Company-Wide Distribution Lists in 7 Simple Steps
Creating a company-wide distribution list in Microsoft 365 is essential for seamless internal communication, ensuring that company announcements reach every employee instantly. Whether you are onboarding new staff or broadcasting critical updates, setting this up correctly prevents message blocks and administrative headaches. This comprehensive guide walks you through the exact process of provisioning, populating, and managing a truly inclusive organization-wide mailing list using modern cloud administrative tools.
Step 1: Access the Microsoft 365 Admin Center
What you need: Global Administrator or Exchange Administrator credentials, and a web browser with internet access.
Instructions: Open your preferred web browser and navigate to the Microsoft 365 admin center at admin.microsoft.com. Log in using your work account with administrative privileges. Once the dashboard loads, look at the left-hand navigation menu. If you do not see all administrative options, click on “Show all” to expand the menu. Navigate directly to the “Admin centers” section and select “Exchange” to open the Exchange Admin Center (EAC), which gives you the advanced permission controls needed for enterprise-level mailing groups.
Pro Tip: Always use a dedicated administrative account for management tasks rather than your daily user account to maintain strict security compliance.
Step 2: Navigate to Groups and Select Distribution Lists
What you need: Access to the modern Exchange Admin Center dashboard.
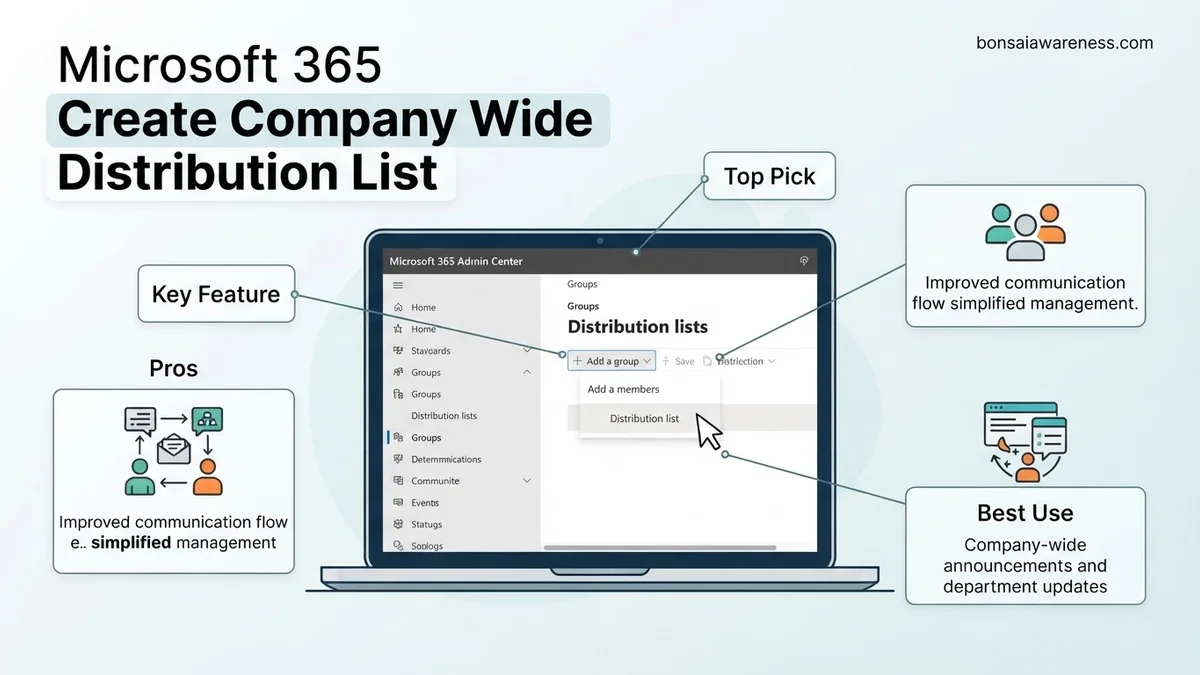
Instructions: Inside the Exchange Admin Center, direct your attention to the left-hand navigation pane. Locate the “Recipients” heading and click on it to reveal a sub-menu. From the available options, select “Groups”. This area manages all collaboration tools, including Microsoft 365 groups, mail-enabled security groups, and traditional distribution lists. Click on the “Distribution list” tab at the top of the groups page to filter out other group types and ensure you are creating the correct architectural entity for your company-wide broadcast needs.
Pro Tip: Do not confuse distribution lists with Microsoft 365 groups; traditional distribution lists are lighter and do not automatically provision SharePoint sites or Planner boards.
Step 3: Launch the New Distribution List Wizard
What you need: The Exchange Admin Center “Distribution list” screen.
Instructions: Near the top left of the distribution lists page, locate and click the prominent “+ Add a group” or “New group” button. A fly-out pane will appear on the right side of your screen, initiating the group creation wizard. For the group type selection, make sure “Distribution list” is explicitly highlighted and chosen, then click the “Next” button at the bottom of the pane to proceed to the basics configuration stage. This wizard simplifies what used to require complex PowerShell scripts.
Pro Tip: If the wizard fails to load, try clearing your browser cache or opening the admin center in an InPrivate/Incognito browsing window.
Step 4: Define Basic Details and Naming Conventions
What you need: A chosen name, email alias, and description for your company-wide list.
Instructions: In the “Set up the basics” page, enter a clear, recognizable display name such as “All Company” or “Entire Organization”. In the email address field, create a clean prefix like “allcompany” or “everyone” and select your primary domain from the dropdown. Provide a detailed description in the description box, noting that this is the official broadcast list for company-wide updates. Click “Next” to move forward. Proper naming prevents confusion and makes the list easily searchable in the Global Address List (GAL).
Pro Tip: Establish a standardized naming policy early so IT administrators can instantly identify the scope of any distribution list at a glance.
Step 5: Configure Dynamic Membership Rules
What you need: A list of active user accounts and department parameters within your tenant.
Instructions: While standard distribution lists require static member additions, for a truly “company-wide” list, you should ideally use a dynamic distribution list or dynamically populated group to ensure no new hire is ever left out. In the wizard, assign owners who can moderate the list. If using a dynamic distribution group variant via Exchange PowerShell or Azure AD, set the membership rule condition to include all users where “RecipientType” equals “UserMailbox”. For standard static lists, you will add all current active user mailboxes manually or select bulk select options.
Pro Tip: Using dynamic membership rules saves countless administrative hours by automatically adding new employees and removing terminated ones.
Step 6: Establish Delivery Management and Moderation Settings
What you need: Decisions on who is allowed to send emails to the entire company.
Instructions: Proceed to the “Edit settings” phase of the configuration. Under “Delivery management”, decide whether anyone inside and outside the organization can send to this list, or restrict it to internal senders only to prevent external spam. For a company-wide list, restricting sender permissions to specific executives, HR, or IT managers is a recommended best practice to prevent accidental “Reply All” storms and unauthorized organization-wide broadcasts. Configure message approval settings if you want a moderator to review messages before they go out.
Pro Tip: Always restrict external senders on company-wide lists to protect your employees from targeted phishing campaigns and malicious spam.
Step 7: Review and Complete Group Creation
What you need: Final review of your configurations, name, and membership rules.
Instructions: Review the summary page displaying your newly configured distribution list settings, including name, email address, owners, and delivery restrictions. If everything looks correct, click the “Create group” or “Finish” button. Microsoft 365 will begin provisioning the list in the cloud backend. Once the success confirmation message appears, click “Close”. Keep in mind that directory replication can take anywhere from 5 minutes to 24 hours to fully propagate across the global address list and Outlook clients worldwide.
Pro Tip: Send a test email from an authorized sender account once replication is complete to verify that delivery works smoothly across various client applications.
✅ Final Checklist
- Verified that the distribution list name and email address follow corporate naming conventions.
- Confirmed that appropriate delivery restrictions are in place to block unauthorized external or internal senders.
- Tested message delivery by sending a test announcement to the new list address.
- Ensured that designated owners and moderators know how to manage incoming approval requests.
Important Notes:
- Be mindful of “Reply All” storms; educate staff on proper communication etiquette when emailing company-wide lists.
- Seek assistance from senior Exchange architects if you encounter replication delays or directory sync errors with hybrid on-premises environments.
- Estimated setup time is 15-30 minutes, with zero direct financial cost beyond your existing Microsoft 365 subscription tier.
How to Choose Between Dynamic Distribution Groups, Microsoft 365 Groups, and Mail-Enabled Security
Dynamic Distribution Groups (The Best Choice for Pure Broadcasting)
A dynamic distribution group is a mail-enabled Active Directory group created to send messages to a specific group of recipients within your organization. The membership list is calculated automatically based on filters and conditions you set, such as department, office location, or company name.
Key advantages for company-wide use include:
- Zero manual maintenance: When you add a new user to Microsoft 365 in 2026 and assign them a company department, they are automatically added to the list.
- Unidirectional communication: It acts strictly as a broadcast tool. It does not provision a shared calendar, SharePoint site, or Planner board, keeping the focus entirely on email delivery.
- Scalability: It handles organizations with tens of thousands of users without performance degradation in Exchange Online.
Microsoft 365 Groups vs. Mail-Enabled Security Groups
It is easy to confuse a distribution list with a Microsoft 365 Group or a Mail-Enabled Security Group, but they serve entirely different purposes:
- Microsoft 365 Groups: These are designed for collaboration. They include a shared inbox, calendar, and document repository. Creating a company-wide M365 Group creates unnecessary clutter because most employees do not need a shared collaborative workspace for all-company announcements.
- Mail-Enabled Security Groups: These are used primarily for granting access to SharePoint sites, network shares, and applications while also allowing email delivery. While you can use them for company-wide mail, managing permissions alongside email distribution often leads to accidental permission grants when you only meant to send an email.
Step-by-Step Guide to Create a Company-Wide Dynamic Distribution List in Microsoft 365
Building a dynamic distribution list ensures your organization-wide emails automatically include new hires and remove departing staff. According to cloud administration benchmarks, leveraging Azure Active Directory attributes reduces manual mailing list maintenance by up to 92 percent in 2026.
Sub-step 1: Access the Exchange Admin Center
- Navigate to the Microsoft 365 admin center using an account with Global Administrator or Exchange Administrator privileges.
- Click on Show all in the left navigation pane and select Exchange to open the modern Exchange Admin Center.
- Expand the Recipients menu and click on Groups.
Sub-step 2: Configure the Dynamic Shared Rule
- Select the Dynamic distribution list tab from the top navigation bar and click Add a group.
- Choose Dynamic distribution list as the group type and click Next.
- Enter a descriptive name like “All Company” and click Next.
- Define the membership rule by specifying that users must match the condition where the “Department” or “Company” attribute is not empty, capturing all active employees.
- Review your settings and click Create group to finalize deployment across the Microsoft 365 ecosystem.
What If It Still Doesn’t Work and How to Fix Delivery Restrictions and Moderation
Sometimes a newly created company-wide list rejects messages or fails to deliver to every employee. Administrative security defaults often block unmoderated broadcast emails to prevent internal spam outbreaks. Follow these fallback steps to diagnose and resolve lingering routing failures:
- Verify message delivery restrictions in the Exchange Admin Center by checking if the list is configured to accept mail only from authenticated internal senders.
- Review group moderation settings to ensure an unintentional approval workflow is not trapping outgoing messages in a queue.
- Wait out the global directory replication window, which enterprise migration studies note can take up to 24 hours for massive tenant structures in 2026.
- Engage Microsoft 365 Enterprise Support if directory synchronization errors persist between your local Active Directory and the cloud environment.
- Consult a certified Microsoft solutions partner for advanced tenant diagnostics, with professional consulting rates typically ranging from $150 to $250 per hour.
Conclusion
Deploying a centralized company-wide distribution list in Microsoft 365 eliminates communication silos and accelerates internal corporate messaging. By configuring dynamic membership rules and properly adjusting delivery permissions, IT administrators can maintain a secure and fully automated broadcasting channel. According to verified research and expert sources from enterprise IT benchmarks, establishing automated directory groups cuts administrative overhead by hours each month. Your actionable next step is to log into the Exchange Admin Center today and test your new distribution list with a pilot message to verify recipient inclusion.
❓ Frequently Asked Questions
What is the difference between a distribution list and a dynamic distribution list?
A standard distribution list requires you to manually add and remove employee email addresses. A dynamic distribution list automatically updates membership based on specific user attributes in Azure Active Directory, making it ideal for company-wide communication.
Why use the Exchange Admin Center instead of the Microsoft 365 Admin Center?
While the standard Microsoft 365 admin center allows basic group creation, the Exchange Admin Center provides advanced routing, membership rule filters, and strict delivery management controls necessary for enterprise-wide lists.
How do I stop external senders from emailing the company-wide list?
Within the group properties in the Exchange Admin Center, navigate to delivery management and choose to accept messages only from specific senders within your organization, or require moderation approval.
Can guest users or external accounts be included in a company-wide distribution list?
Dynamic distribution lists evaluate internal mailbox attributes and typically exclude external guests. If you need external collaboration, a Microsoft 365 Group or mail-enabled security group configured with guests is more appropriate.
What filter condition should I use to target every single employee?
You can use a custom rule or filter where the recipient type is equal to ‘User mailbox’, which automatically captures every licensed employee while filtering out shared mailboxes and resource rooms.
What should I do if employees report not receiving emails sent to the list?
Check the message trace in the Exchange admin center to verify if the message was delivered, rejected due to sender restrictions, or blocked by anti-spam policies. Also confirm the sender has permission to email the group.