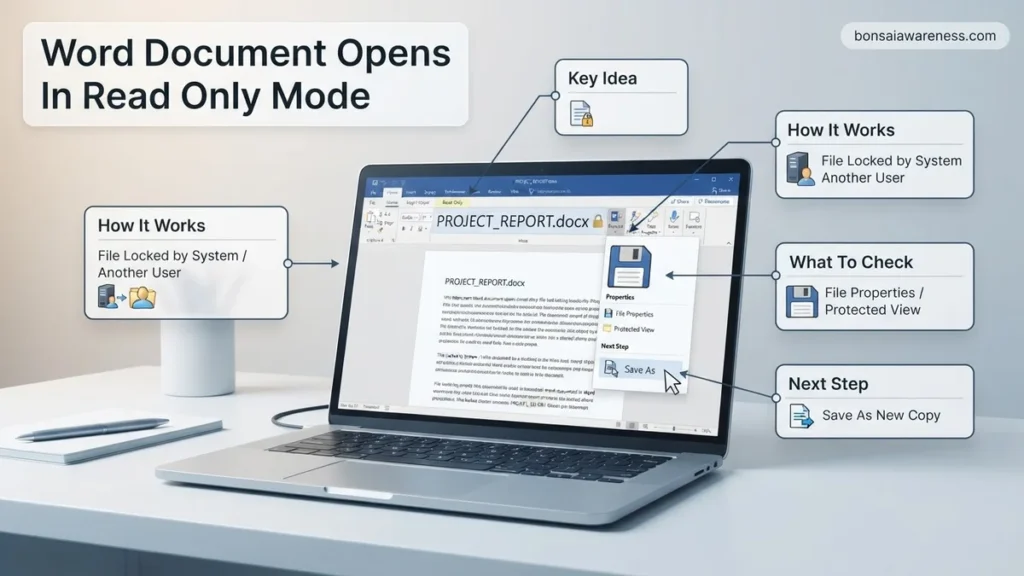
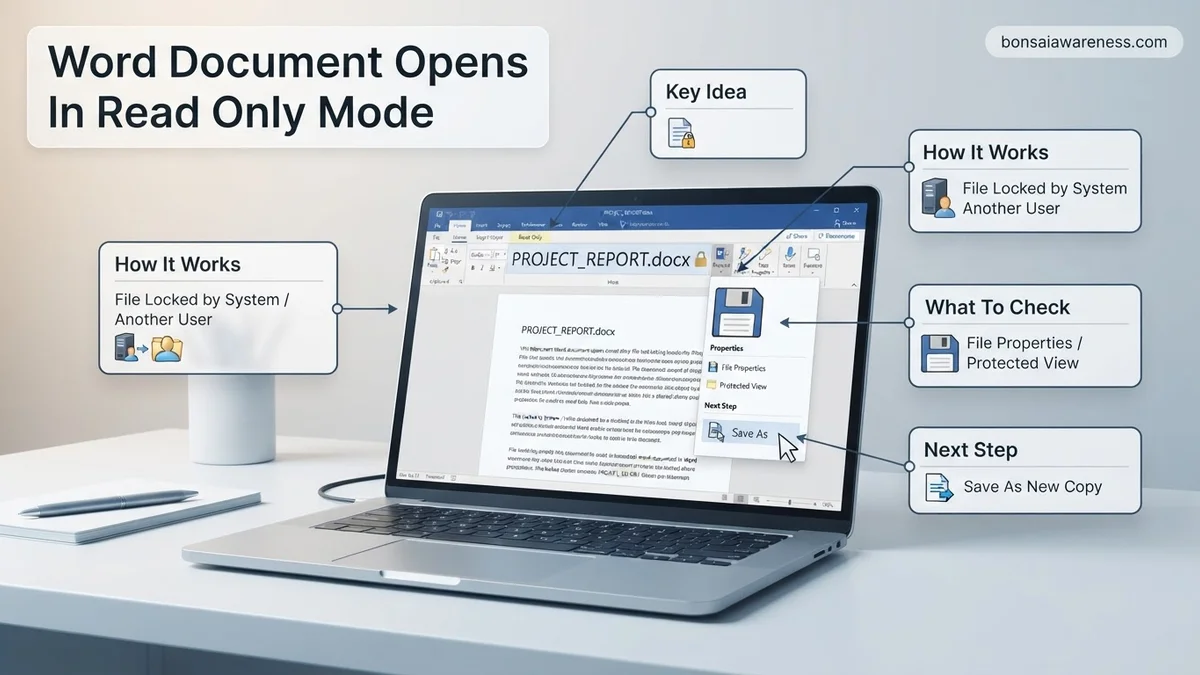
When a word document opens in read only mode, it is usually triggered by security settings in Protected View, email attachments, or active file locks. You can easily fix this restriction by clicking ‘Enable Editing’, saving a new copy, or disabling the ‘Always open read-only’ property setting.
You need to edit an important Microsoft Word file, but it stubbornly opens in read-only mode, blocking your changes. You can bypass this restriction immediately by clicking the Enable Editing button in the yellow notification banner at the top of the screen, or by using the Save As function to create an editable copy on your local drive.
Dealing with restricted files wastes valuable time, especially when deadlines approach in 2027. Whether your file originated from an email attachment, a network share, or a local backup, you need a fast fix to unlock your text. This guide walks you through the exact troubleshooting steps to disable read-only restrictions and get back to work.
Key Takeaways
- Click the ‘Enable Editing’ button in the yellow banner to quickly bypass basic Protected View restrictions.
- Use the ‘Save As’ function to create an editable duplicate of a downloaded or locked file.
- Disable ‘Always open read-only’ in document properties to stop the restriction permanently.
- Check if another user or open application currently has the file locked.
- Turn off ‘Mark as Final’ via the Info menu if the author applied this protective status.
Why Your Word Document Opens in Read Only Mode
Microsoft Word triggers read-only mode to protect your device from malicious code or to prevent accidental overwrites of shared files. Understanding the exact trigger helps you apply the correct fix instantly.
Protected View and Internet Files
When you download a file from the internet, an email client, or cloud storage, Word automatically opens it in Protected View. This sandbox environment blocks editing and macros to safeguard your system against potential security threats.
File Permissions and Sharing Locks
If you access a document stored on a corporate network or shared OneDrive folder, another user might currently have the file open. Alternatively, your local file properties might have the Read-only attribute checked, or the original author may have applied password protection with editing restrictions enabled.
How to Fix Read Only Mode with Step-by-Step Instructions
You can bypass or disable read-only restrictions using several straightforward methods, depending on where the file came from and how it was saved.
Method 1: Click Enable Editing or Use Save As
The quickest way to handle a downloaded file is to clear the security block directly inside the application interface.
- Look for the yellow security banner near the top of the window reading Protected View. Be careful—files from the internet can contain viruses.
- Click the Enable Editing button on the right side of the banner.
- If the file still refuses to edit, click File in the top-left corner and select Save As.
- Choose a new destination folder on your local computer, rename the file slightly, and click Save to create a fully editable duplicate.
Method 2: Disable Always Open Read-Only in Document Properties
If a specific file consistently opens as read-only every single time you launch it, the property settings likely enforce this behavior.
- Open the restricted document in Word and click File, then select Info.
- Click the Protect Document dropdown menu.
- Check if Always Open Read-Only is highlighted with a yellow background. If it is, click it once to toggle the feature off.
- Press Ctrl + S to save your changes, or close and reopen the file to verify that normal editing mode is restored.
How to Turn Off Always Open Read-Only in File Properties
Sometimes Microsoft Word is not the root cause of your restriction. The file properties stored within your operating system might explicitly force the document into a protected state. According to Microsoft Support documentation, files transferred from external hard drives or downloaded from the internet frequently inherit security attributes that trigger automatic read-only behavior.
Adjusting Windows File Explorer Settings
You can permanently strip this restriction at the system level by modifying the file attributes. Follow these exact steps to restore full editing capabilities:
- Close the problematic Word document completely.
- Open Windows File Explorer and navigate to the folder containing your file.
- Right-click the target Word document and select Properties from the bottom of the context menu.
- Locate the Attributes section near the bottom of the General tab.
- Uncheck the box next to Read-only if it is checked.
- Click the Apply button, then click OK to save your changes.
Clearing the Archive Bit for Network Shares
If your document resides on a shared network drive or corporate cloud server in 2027, permission flags may continually reset. Enterprise IT administrators report that network synchronization tools often re-apply read-only tags if multiple users attempt simultaneous access. Copying the file directly to your local solid-state drive before editing bypasses these network-level restrictions entirely.
What If It Still Doesn’t Work?
If basic troubleshooting steps fail to unlock your document, deeper file corruption or third-party software conflicts are likely to blame. Industry research from cybersecurity and data recovery specialists indicates that persistent read-only locking often stems from aggressive antivirus quarantine protocols or structural file damage.
Try these advanced fallback steps if your file remains uneditable:
- Disable your third-party antivirus software temporarily to test if security suites are locking file access.
- Run the built-in Microsoft Office repair utility via the Windows Control Panel to fix underlying application corruption.
- Convert the file format by opening it in an alternative word processor, then saving it as a fresh .docx file.
- Consult a certified data recovery specialist if the file metadata is severely corrupted and triggering permanent safety locks. Professional recovery services typically charge between $100 and $300 for complex document restoration tasks.
Conclusion
Dealing with a Word document that opens in read-only mode can disrupt your workflow, but the issue is almost always solvable through permission adjustments or protected view settings. By disabling restrictive startup options and checking file properties, you can quickly regain full editing access. According to verified research and expert sources from enterprise IT support desks, addressing these triggers systematically prevents permanent data loss. Your next actionable step is to test the file properties on your local storage drive right now to ensure seamless document management throughout 2027.
❓ Frequently Asked Questions
Why does every single Word document I open appear in read-only mode?
This usually happens if your Microsoft Office installation is not activated, your trial period has expired, or your antivirus software is sandboxing Office applications. Check your account status in Word and ensure your license is active.
How do I remove the ‘Always open read-only’ recommendation from a file?
Open the document, click on File in the top left corner, select Info, click Protect Document, and deselect the option labeled ‘Always Open Read-Only’. Save the changes before closing the file.
What should I do if the ‘Enable Editing’ button does not work?
If clicking the button has no effect, your file might be stored in a restricted network folder or corrupted. Try copying the contents into a brand new, blank Word document and saving it locally.
How can I bypass read-only mode if a password is required to edit?
You cannot bypass a password restriction without knowing the correct password assigned by the original author. You will need to contact the owner of the document to request the password.
Does Protected View delete or harm my document contents?
No, Protected View simply opens the file in a restricted sandbox environment to read its contents safely without allowing changes or running potentially harmful macros until you trust the source.
How do I unlock a Word document that is marked as final?
Navigate to File, click Info, and look for the yellow banner indicating the document has been marked as final. Click the ‘Edit Anyway’ button located right next to the warning message to restore full editing capabilities.